Thursday, May 30, 2013

animation

animation take a real long time to render..
but it's fun to see things move.
animating a moving ball 

 just to adjust the time frame below and move the ball to direction,
then the ball will be animated like how you move in the time frame


trying to make the ball run with pulling the time frame to further and start to rotate the ball


a tried up video. just 2 second but wasted 15minutes to render 


Camera, lighting, material

It is quite easy to apply material with mental ray.
Many choices of material is already set and just have to click it to apply.
UMW map is another new tool learnt to scale the dimension of material with GIZMO

this is rendered with sun lighting applied

Next, Camera is being taught.
Setting a camera view is to convenient us to apply material perfectly on the specific view only.

click on camera and target. 
There are a few of dimensions that can be chosen ,
which depends on how wide you want the view be.

then move your camera to desired view

rendered effect

Lighting is also being taught. (artificial) 

choose the light you want and adjust to space that you want it to be illuminated

one of the rendered effect with beautiful shadow

another rendered effect

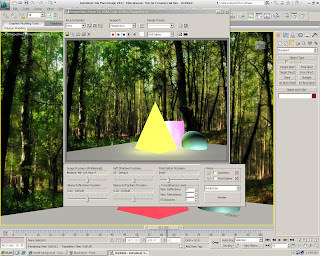
Illumination, glow an object

rendered effect of it

and then, learnt how to put background

bitmap and set the render option to create a desired background


Thursday, May 9, 2013

different perspectives of modeled HOUSE D

exterior

another exterior

ground floor interior

first floor interior

ground floor interior

side view exterior

Sunday, May 5, 2013

DONE with modelling in 3d max

After finished tracing floor plan in cad, i imported the file to 3dmax and start modelling it..
As i already grouped each things together..its easy for me to extrude out wall and so on.

extruded some part of D house: flooring, wall, outdoor path


extrude hill and making slope for it by converting it to poly and edit the edge
(the hill is artificial so it does not need to make difficult height of contour)


edit some fixed furniture(customize)

done for ground floor

And, i started with 2nd floor. 

 start to extrude walls and create openings

boolean window frame and create glass for it. 
Do the same for opposite side as its the same.

create the wood louvers and roof. Lastly join 2 floor together

DONEEEEEE................


Saturday, May 4, 2013

Rhino- 2nd class

this class learnt more basic tools again.

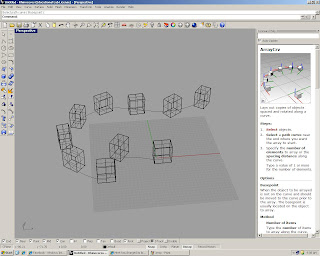
FIRST, ARRAY AND ARRAY ACCORDING THE CURVE MADE

array

array follows curve

STRETCH a box 


SPLIT any way you want


OFFSET a wall out with making line


PROJECT wording or anything wanted on wall.


use SPLIT method to make hole on object


there's a PIPE tool to build any kind of column's shape


rhino able to make a 2d flat view on the desire view you want and export it to create a layout of your design